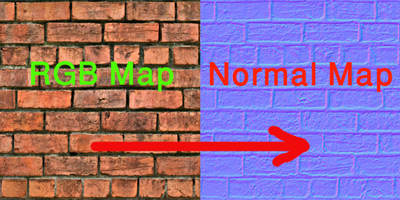
Photoshop: How to create the normal map from the original image
1- Download and install the Nvidia's Normalmap Plugin:
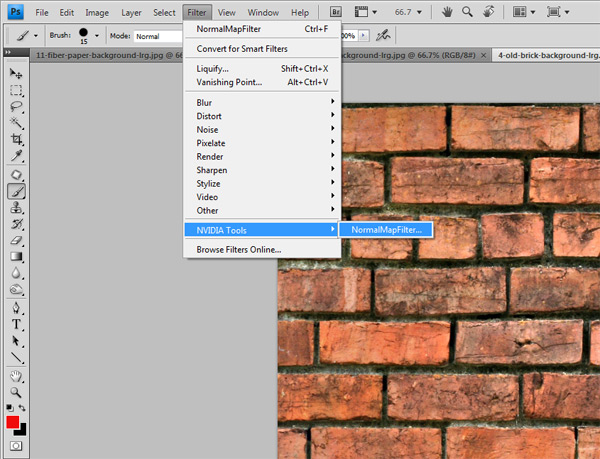
2- Open your texture in Photoshop and follow the path to find where the NormalMap filter is located:
Menu >> Filter >> NVidia Tools >> NormalMapFilter
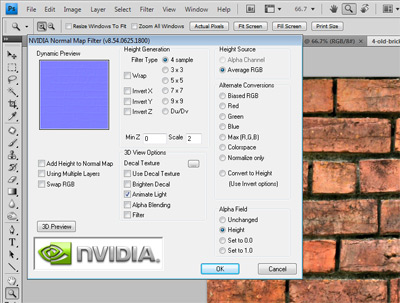
3- Normal the map
Just select the "Average RGB" From the Height Source section and leave the rest as it is. Then press OK to apply the filter on your texture.
4- Add accuracy and details
Duplicate the layer containing the image, go to that layer and apply a Gaussian Blur with a small value like 0.5. Now change the new layer's blend mode to Overlay. You may repeat the step 4 few more times in order to attain the satisfying details. Then, flatten the layers into a single layer image: Menu >> Layer >> Flatten Image
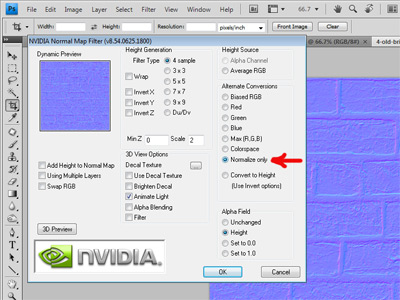
5- Normalize the map
Once again apply the NormalMapFilter from: Menu > Filter > NVidia Tools > NormalMapFilter
From the filter settings choose the "Normalize Only" option from the "Alternate Conversions" section this time.
From the filter settings choose the "Normalize Only" option from the "Alternate Conversions" section this time.